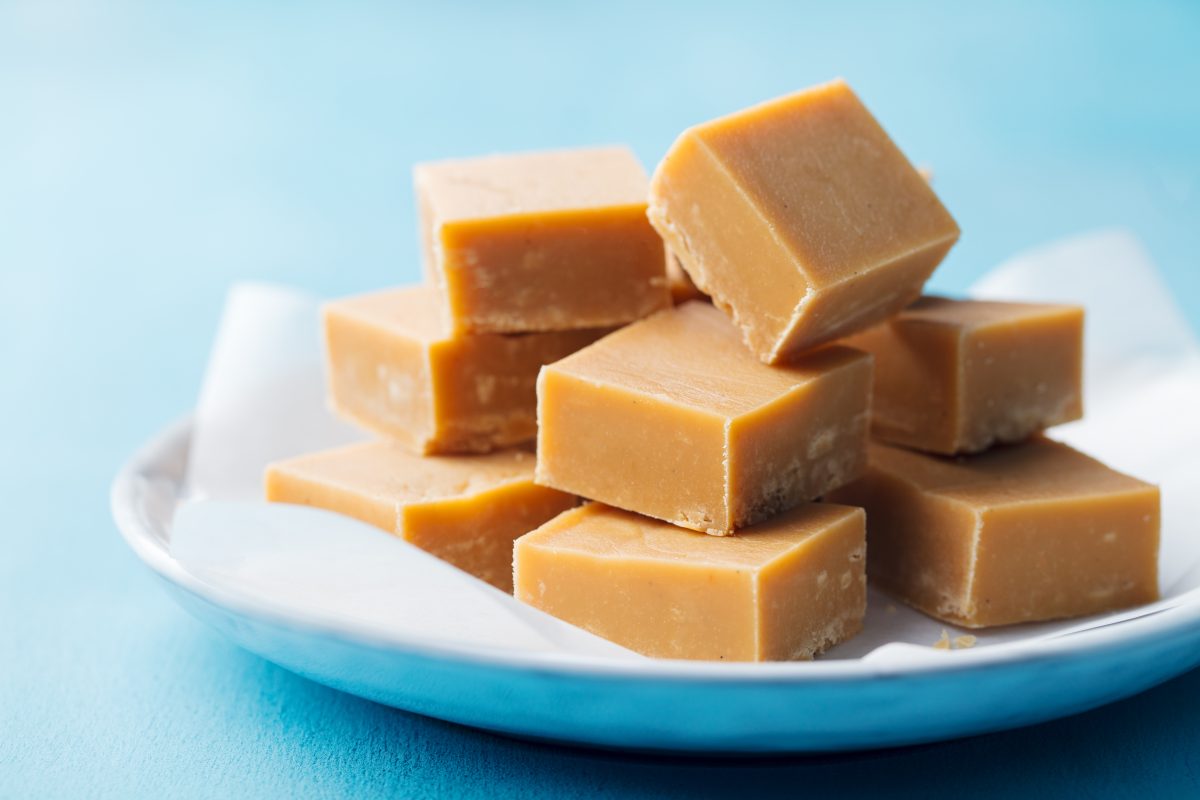
Salmon Sweet Potato Croquettes Recipe

By Gina Greco, Senior Brand Marketing Specialist, SEMCA

**NOTE:   The Sharp Superheated Steam Countertop Oven (SSC0586DS) is not sold in Canada, however this recipe will work in a conventional oven. Temperatures and baking times are stated in the baking instructions as an option.


This recipe is a fun twist on the classic croquettes appetizer – these Salmon Sweet Potato Croquettes are sure to become a favorite between family and friends! This mindful (yet still delicious) appetizer is baked, not fried, and is the perfect bite-sized dish to serve as an appetizer or as a main course along with a salad. Learn how to make croquettes without deep frying.

What Are Croquettes?

My family isn’t one for fancy appetizers for a typical Sunday dinner. While we may like to incorporate every meat we could think of to the dinner menu that day, we usually steer clear of the typical foodie recipe video dishes from Facebook. While delicious, our entire Sunday dinner each week isn’t really “gourmet.” We stick to the basics — sautéed veggies and potatoes, a lasagna, eggplant rollatini, and of course, some floured chicken.

Wanting to elevate our Sunday dinner this week, I started brainstorming mindful and delicious appetizers that would appeal to everyone, be simple to make, and add an elegant touch to our day. There is nothing wrong with switching things up every once in and while, right?

Croquettes are a classic dish served around the world. They can be made with a variety of fillings, from potato to seafood. Traditionally coated in breadcrumbs and deep-fried, these decadent delights serve as appetizers in some parts of the world; some places are a snack and the main course in others.

I decided I wanted mine to be an “in-between” dish. Rather than just potatoes or seafood, I combined roasted sweet potatoes and salmon — an excellent choice!

These are beyond delicious. I’ve made this recipe 3 times in the past 2 weeks, and we can’t get enough.

I have made these in larger “patties,” but if serving at a large gathering, consider making twice as many half the size.

Baked, Not Fried!

The last thing you want to do when you’re having people over is deep fry a dish! Actually, in my opinion, the last thing you want to do ever is deep fry a dish. It’s messy, you’re making appetizers one or two at a time, and I feel like you really lose the flavor in the food.

That is the simple yet beautiful thing about this baked croquette recipe; it turns out golden brown and with a nice crunch, no frying necessary.

I’ve been making these in my Sharp Superheated Steam Countertop Oven, and I am head-over-heels in love with the results. It cooks the croquettes quickly and evenly, allowing for a crunchy outside and a moist and delicious inside. It’s perfect for making appetizers – no need to turn on a big oven for 1 tray!

This countertop appliance uses a combination of superheated steam and convection (like you would find in your traditional oven).

Having this oven means that I actually can serve hot appetizers on the weekend without making a massive mess in my kitchen. While I focus on making dinner,  I can put a tray of these into my Sharp Superheated Steam Countertop Oven and forget about them until the cooking time is over, thanks to the countdown cooking.

How to Make Croquettes with Sweet Potatoes and Salmon

This recipe is simple to make and sure to be a favorite! Trust me.

Start by peeling and slicing sweet potatoes and roasting along with a fillet of salmon.

When those are roasted, add them to a food processor along with:

  • Some finely minced onion to add a savory touch.
  • Minced jalapeno, for a little kick of heat – a high contrast to the sweet!
  • Lemon juice, to balance the sweetness of the potato
  • Lots’ o chopped herbs — I used parsley and dill.
  • A bit of sea salt – always!

Coat these with an egg dip and gluten-free breadcrumbs.

Rather than buying gluten-free breadcrumbs, make a more mindful, cleaner version at home.

Options for gluten-free breadcrumbs:

  • Salted brown rice crackers, processed in a blender into coarse flour (this is what I’ve used – it gets so crunchy!).
  • A 50/50 combo of almond flour and processed brown rice crisp, seasoned with a few sea salt pinches.

Once they are coated, bake and serve with your favorite dipping sauce!


Print


Salmon Sweet Potato Croquettes Recipe

 
Course Main Course
Cuisine American
Keyword Croquettes, dinner, Gluten Free, recipe, salmon, steam, supersteam
 
Prep Time 20 minutes
Cook Time 40 minutes
Total Time 1 hour
 
Servings 10 Croquettes
 

Ingredients

  • 1 pound sweet potatoes
  • 1-1/2 pounds salmon fillets
  • 1/3 cup parsley chopped
  • 2 tbsp fresh dill chopped
  • 2 tbsp lemon juice
  • 1 tbsp onion finely minced
  • 1-2 tbsp jalapeno finely minced, depending on heat
  • 3/4 tsp sea salt
  • 1 egg
  • 1-1/2 cups gluten free breadcrumbs*

Instructions

  • Peel and slice sweet potatoes, and add to a baking tray along with salmon fillet. 
  • In the Sharp Superheated Steam Countertop Oven, bake at 425 for 20 minutes. In a conventional oven, bake at 425 for 30 minutes.
  • Once the potatoes and salmon are baked, add the sweet potatoes, herbs, lemon juice, onion, jalapeno and sea salt to a food processor, and process until the potato is broken up.
  • Add the baked salmon, and pulse until the salmon is mixed in, but still in chunks. Don’t overprocess.
  • Whisk an egg in a bowl, and add breadcrumbs to a second bowl.
  • Form 1/4 cup sized patties. The mixture is soft and a bit sticky, but form them delicately. The mixture is easier to form into patties if it’s chilled.
  • Dip each patty into the egg, and then coat in breadcrumbs.
  • Bake croquettes in the Sharp Superheated Steam Countertop Oven on Broil/Grill on 425 for 12 minutes, and then flip and continue baking for another 4 minutes. In a conventional oven, bake on 425 for 15 minutes, and then flip and continue baking another 6 minutes.


Inaugural Sharp@School program helps five Ontario schools improve access to technology

By Rolland (Ron) Manger, Director, Sales & Marketing, Sharp Electronics of Canada Ltd.

It’s important that students have access to tools that can help them learn, focus and work together. This fall we were proud to donate technology to five schools in the Greater Toronto Area to help them create an equitable learning environment.

The Sharp@School program worked with Monarch Park Collegiate Institute, Lakeshore Collegiate Institute, Etobicoke School of the Arts and James S. Bell Junior Middle Sports and Wellness Academy in the Toronto District School Board (TDSB); and Our Lady of the Rosary Catholic Elementary School in the York Catholic District School Board (YCDSB), to provide calculators, collaboration and professional displays and air purifiers.

During the pandemic, students have been asked to minimize what they bring to school and to reduce the number of items they share for safety reasons. “By having that resource in their classroom, students no longer have to worry about bringing their own or sharing with others,” said Melissa Michailidis, Mathematics Department, Etobicoke School for the Arts.

Here’s how Sharp technology will be used in the Sharp@School program:

Calculators support numeracy throughout elementary and high school

Sharp calculators will support numeracy programs by reducing distractions from phones and providing a tool that students can become familiar with and use as they rise through each grade. EL243SB calculators will be used in Grade 3 and above. High school students need complex functions, and can benefit from using the same device throughout their high school careers because they can spend more time on solving equations and less on learning how to use a device. Our EL501XBWH and ELW516XGBSL scientific calculators include all the functions a high school student will encounter in their math classes. Altogether, we’ve provided 2,000 calculators to Sharp@School participants.

Displays create new ways for students to collaborate and get important information

The schools envisioned interesting ways to use displays in their environments. At Lakeshore Collegiate Institute, they plan to use a Sharp AQUOS Board ® collaboration display as a large digital canvas. Students can capture their thinking on the touchscreen, opening up opportunities to be creative and solve problems as a group. Other schools have been excited by the idea of using PNM401 and PNUH601 professional displays to share student accomplishments and announcements, and improve access to information. Math teachers will use the displays to share the locations where students can get extra help.

Air purifiers for classrooms

Sharp’s donation also included FPK50UW Plasmacluster Ion Air Purifiers with True HEPA Filtration. Sharp’s technology helps reduce dust, germs, bacteria, viruses, and odours.

We believe the right technology can have a huge impact on how students learn and work together. As the five schools participating in Sharp@School start incorporating the $50,000 worth of technology into their classrooms and routines, we look forward to hearing their feedback about how the technology is improving student learning.


It’s National Peanut Butter Fudge Day!

By Jena Branco, Marketing Coordinator, Brand & Marketing Communications, SECL

What the fudge!! That’s right folks, you read it correctly … there is such a day as National Peanut Butter Fudge Day … and it happens to be today, November 20th. Unfortunately, for someone like me, peanut butter or anything peanut-related is out of the question due to severe sensitivities, but that shouldn’t deter me from blogging about it.

This North American holiday was established by the National Peanut Board (in the U.S.) and is a special day to indulge in this sweet and tasty treat. Here are today’s five things to know about Peanut Butter Fudge:

  • Fudge was invented in the United States more than 100 years ago
  • The exact origin is disputed, but it is widely believed that the first batch of caramels made around the late 1800’s didn’t turn out quite right, hence the name “fudge.”
  • Georgia is the #1 peanut producing American state. Fun Fact: Peanuts are grown in Canada, they were introduced to Canadian soil in 1982. However, only in the southerly part of the Province of Ontario as our climate isn’t very conducive to growing peanuts, which require sandy soil and hot dry weather.
  • The most popular North American fudge flavour is chocolate
  • The average peanut farm is approximately 100 acres

So how do people celebrate Peanut Butter Fudge Day? Bake offs, tastings and other fun food related events are a few ways that people celebrate this day. However, one of the best way to celebrate Peanut Butter Fudge Day is to create your own batch and enjoy eating it with those you love. Be adventurous, use your imagination to create a unique twist to the standard recipe by layering it, adding chocolate chunks or peanut chunks, or topping it off with caramel drizzle and pretzels, or simply sprinkle with salt.

For those who are anaphylactic or have degrees of sensitivities (like me) to peanuts, there are a few Peanut Butter alternatives you might want to consider when making fudge.

  • Sunflower Seed butter. Sunflower butter is a great option for those who are allergic to not just peanuts but also tree nuts. I’ve been told that the closest spread to peanut butter in terms of flavour and texture is sunflower seed butter. It’s relatively easy to find (in the natural food section of your grocery store, sometimes called Seed Butter) and has a nice nutty flavour, smooth and spreadable.
  • Almond butter (only if you are not allergic to tree nuts)
  • Cashew butter
  • Soy Nut butter
  • Pea butter

Simple Ingredients

I’ve been making fudge for a few years now, and it’s one of those desserts that I like to include, along with a variety of cookies, as a delicious food gift when visiting with friends and families during the holidays. I recently came across an easy fudge recipe from Chef John, as I had a friend dropping in (and I knew she has a major sweet tooth) but was lacking a few ingredients required from an old fudge recipe that I had. What I like about this recipe is that all the ingredients were readily available in my pantry and refrigerator. This was definitely a sign from above!! It takes about 15 mins to prepare and only requires 1 to 3 hours to set.

I have since ditched my old fudge recipe …

Nothing fancy about this fudge recipe. All you need are: powdered sugar, unsalted butter, smooth peanut butter (or a peanut butter substitute), kosher salt, and vanilla. These simple ingredients will yield a fudge that is decadent and delicious. Also, it’s dense and firm in your fingers, but will dissolve in your mouth. Reminds me of a famous confectionary slogan “melt in your mouth, not in your hands” and this fudge does exactly that!

During the Christmas holidays, I like to display the peanut butter fudge in a glass covered dome up to a week on the kitchen table, or you can store them in a tight sealed container up to 2 weeks in the fridge. The most important note to remember, is that you must store it air tight to keep it from drying out and crumbly.

Easy Peasy

This old-fashioned peanut butter fudge recipe will be enjoyed by your whole family for many years to come. Everyone who has tried them, loved them — reminds them of how Grandma would have made them!

Note, that I substituted the peanut butter in the recipe with natural smooth almond butter, and my family thinks it’s super delicious!

Ingredients

  • Powdered sugar (1 pound or approx 3 ¾ cups)
  • Unsalted butter (1 ¼ cups)
  • Smooth natural peanut butter (1 ½ cups)
  • Kosher salt (½ teaspoon)
  • Pure vanilla extract (1 ½ teaspoons)

Chef’s Notes:

  • This recipe will work with other nut butters, smooth or chunky, like almond or sunflower seed. Make sure you use all natural nut butters (2 ingredients on list), not the processed nut butter which includes sugar and hydrogenated vegetable oil.
  • Use ¼ teaspoon fine salt instead of kosher, if desired

Directions

  1. Sift powdered sugar through a fine-mesh strainer into a large bowl.
  2. Heat butter and peanut butter in a saucepan over medium heat. Whisk ingredients together and cook until bubbles appear on the edges, 3 to 5 minutes.
  3. Stir in salt and vanilla extract.
  4. Remove from heat and pour over powdered sugar in the bowl. Mix together using a spatula until smooth.
  5. Spread mixture into an 8×8-inch baking pan lined with plastic wrap. Let it cool for approx 30 mins.
  6. Wrap pan fully and refrigerate until firm enough to cut but not too hard, approx. 1 to 3 hours.
  7. Unwrap fudge and cut into 1 inch cubes (will yield 64 small cubes).
  8. Let fudge warm up on the counter before cutting, if needed.

For that Confectioner that made that mistake back in the 1880’s, we thank you as it turned out to be a delicious revelation that people have been enjoying all around the world ever since.


Easy Egg Frittata Breakfast Muffins

By Jena Branco, Marketing Coordinator, Brand & Marketing Communications, SECL

Start your day right with these Easy Egg Frittata Breakfast Muffins! They are packed with vegetables and protein, baked in advance … and portable for when you’re on the go!

Although I get up at 6:00am in the morning, it seems I’m always in a rush to get my son out the door at 8:25am to get him to school and me to work on time. My morning routine consists of a workout, preparing lunches, dinner prepping, waking up my teenage son to get him ready for school (which is a major chore in itself), and lastly, jump in the shower and get myself ready for work in a span of just over two hours. Oh, and I forgot to mention … have a quick and healthy egg breakfast to start the day right.

A toasted English muffin with avocado or instant oatmeal with berries are my usual go-to breakfast, but when I need a low carb, protein-packed, hot and savoury breakfast, I turn to these healthy breakfast egg muffins! They are tasty, easy to prepare, cooked ahead of time and refrigerated, but mostly, I like the fact that I can make them individually, just the way my family likes them.

Customize Your Own Frittata Muffin

You don’t need a lot of ingredients, simplicity is best. However, at times, I take the opportunity to use ingredients that I have leftover in the fridge. For example, if I had extra chicken from last night’s dinner, I would shred the chicken and add them to my egg fillings. Great too if you have any leftover steamed or roasted vegetables, and almost all fresh vegetables can be used. Use whatever you have on hand, this is the best way to use them up, because mostly everything goes well with eggs.

Here are a few combinations that my family enjoys, but the combinations are endless, and not limited to:

  • Spinach, peppers & feta
  • Mushroom, peppers & cherry tomatoes
  • Bacon & cheddar
  • Shredded chicken, broccoli & cheddar
  • Cooked sausage, peppers & TexMex cheese
  • Ham, cooked broccoli, and mozzarella cheese

Not only are these frittata egg muffins great for breakfast, but make for a delicious and nutritious lunch, or even an afternoon snack. They are also perfect for those on a keto or gluten-free diet!

In today’s recipe, I used spinach, feta, red onions, red peppers, and shredded cheese because that’s what I had in the fridge.

Easy Preparation and Great for Meal Prep

To make a 12 cup muffin pan worth of egg muffins, you’ll need about a dozen eggs in total. Chop your filling ingredients, and in a separate bowl, whisk your eggs together with salt and pepper. Preheat your oven to 350ºF. Brush or spray a 12 cup muffin pan liberally with oil, butter, or non-stick spray to prevent the egg muffins from sticking. Evenly distribute the filling ingredients among the muffin pans, then pour the egg mixture into each cup, filling about 3/4 full. The muffins will puff up while they cook in the oven, so don’t overfill to prevent overflow.

If you want to substitute whole eggs with egg white, keep in mind that for every whole egg, substitute with 2 egg whites or 1/4 cup of egg substitute.

You can store these egg cups in an airtight container or zip-top bag in the refrigerator for up to 3 days or individually wrap and freeze for up to 3 months. To reheat the egg cups, I simply place them on a plate and microwave for about 20-25 seconds (if refrigerated), or for 1 minute (if frozen, wrapped in paper towel) until they are warmed through.

Make a batch of these tasty egg frittata breakfast muffins and breakfast is ready in no time!

Ingredients

  • Spinach, coarsely chopped (1 1/2 cup)
  • Red bell pepper (1/2 cup)
  • Red onion, finely chopped (1/2 cup)
  • Feta cheese, crumbled (1/4 cup)
  • Mozzarella and Cheddar, shredded mix (1/4 cup)
  • Eggs (12 large)
  • Salt and pepper, to taste

Instructions

  1. Preheat conventional oven to 350ºF.
  2. If using the Sharp 24″ Superheated Steam Oven (SSC2489DS), use the Convection Bake function and bake at 325°F for 20 to 22 minutes.
  3. Liberally coat each muffin cup with cooking spray, oil, or butter.
  4. Distribute spinach, peppers, onions, and cheddar cheese evenly in six of the muffins cups
  5. Distribute spinach, onions, and feta cheese evenly in six of the muffin cups
  6. In a bowl, beat eggs until smooth. Season with salt and pepper.
  7. Pour the egg mixture and fill into each muffin cup to 3/4 of the way up
  8. Bake for 20 to 25 minutes, until the egg muffin cups are set.
  9. Let cool for a few minutes, and then remove them from the pan and enjoy immediately, or let cool completely and refrigerate for meal prep or freeze for later.

Kitchen Appliance Trends You Won’t Want to Miss

By Gina Greco, Senior Brand Marketing Specialist, SEMCA

Wondering what kitchen appliances are trending this year? If you are obsessed with home appliances and adding new gadgets into your kitchen as I am, you have come to the right place.  For one, Superheated Steam Ovens are definitely trending with baking enthusiasts looking for restaurant and bakery-quality performance. 

A favorite method of cooking overseas, steam ovens in the US, had largely been the domain of restaurant kitchens in the form of free-standing combi-ovens as tall as your refrigerator and costing tens of thousands of dollars. Superheated steam ovens are remarkable; there are no two ways about it.

You may not realize it at first, but it is very rare to find a whole new cooking method in an appliance; trust me, I’ve tried. More commonly, I find reboots: countertop grills, versatile pressure cookers, multi-function blenders. Painting a new, blue non-stick surface or adding a rotisserie bar to a countertop toaster oven is not revolutionary.

Sharp IoT appliance being used

Some built-in steam ovens have made their way to the home appliance arena, but the SuperSteam+ Built-In Wall Oven doesn’t just use steam; it is the only oven that uses purely superheated steam up to 485°F. That is hot enough to brown food, like crispy bacon and crunchy cookies. We offer many tips and tricks to using steam ovens, as well as some fantastic recipes like Gluten-Free S’mores Cupcakes and Vegetarian Enchilada Casserole.

Appliance Features and Options

People seem to be looking for small conveniences, little luxuries, and dependability in their kitchens. For countertop appliances, sometimes all you need to grab your attention in a countertop appliance is thoughtful lighting. Many of us would turn away from that cute gold-plated toaster oven at the store if it didn’t have bright LED lighting inside when you open the door.  

Sharp air purifier on wooden bench

Especially in this new work from home age, many of us are also looking for peace-and-quiet in new places and ways. With the pandemic affecting the area I live in so heavily, air purification became a big concern. I purchased several air purifiers to circulate the air throughout my home. It was important for me to find Air Purifiers covering the square footage of my kitchen and living room and featured Library Quiet operation.

Whether I am trying to get a good night’s sleep or find myself working from home in any room of your house, I wanted to find the harmony I was looking for.  I ended up deciding on both the Sharp Plasmacluster Air Purifier with True HEPA Filtration and Humidifying Function for Large Rooms (KC860U) and the Sharp True HEPA Air Purifier with Plasmacluster Ion Technology for Medium-Sized Rooms (FPK50UW) because they matched the square footage of several rooms in my home quite nicely. 

Touch-Controls are trending in modern kitchens, too. Knobs, switches, and buttons are fading in exchange for sleek, responsive, and easier to clean options. I am currently obsessing over microwave drawer oven because they feature hidden panels with responsive, touch-glass controls that simply wipe clean. Plus, it adds a premium look and feel to my kitchen design and takes my microwave oven off the counter and into the island. 

Sharp Microwave Drawer with a breakfast muffin inside

Going one step further, the latest Sharp Microwave Drawer Oven trend is “Easy Wave Oven.” So, you don’t even need to touch the oven to open the drawer! Simply wave up-and-down near the motion sensor, and Microwave Drawer Oven will glide open, is that cool or what? The oven stays closed when you walk by, too, so you won’t have to worry about children and pets accidentally opening it.

Appliances with New Technologies

Sharp Microwave Drawer in a wooden kitchen design.

Many readers have expressed that they are cautious about IoT in the kitchen. Trust me; I understand your concerns. My family and I were cautious, too, at first. The idea of my Microwave Oven turning on from one or two simple voice commands was too much for me to process. That was until I realized how much more convenient my day-to-day became in the kitchen.  That is why the Wi-Fi’s smart features enabled the Microwave Drawer Oven, which uses the Sharp Kitchen App, focusing on convenience. This appliance uses IoT technology and a mobile app to easily make features of the appliance accessible, even the less popular features. It is amazing how many people are not aware that there is a “power” button on their microwave oven. Others may not have ever tried “auto-cook” or “sensor defrost.” Tasks that may seem challenging to perform from the control panel are simple and easy to do using the app.  

 Appliance Aesthetic Trends

Sharp Built-In SuperSteam+ Oven

While vibrant color and retro-design appliances find their way into design magazines and showroom floors, both retro and color are commitments, most people aren’t willing to make. What are you going to do when that limited-run “minty-aqua” countertop microwave with TV knobs your purchased 10 years ago breaks?

Modern kitchen design with mirrored cabinets.

Stainless Steel is king. That isn’t changing any time soon. Although color has had great success in countertop appliances, it is very restrictive in large kitchen appliances. Grey had a moment. It may not have been exciting, but your entire look wouldn’t fall apart because your upgrade and replacement paths could be either stainless steel or black stainless. The same would probably be true with the new, white appliances with stainless steel handles and trims… you could still retreat to stainless steel’s safety.

Black stainless steel has seen a steady rise in popularity for its elegant contrast, bold statement, and growing catalog. Naturally, Stainless steel never goes out of style. As your family’s needs change, your appliances will, too. Sticking with the classics means stress-free upgrades and replacements.


What are your favorite new kitchen trends?


Celebrating Diwali at Home

By Jena Branco, Marketing Coordinator, Brand & Marketing Communications, SECL

Diwali is India’s biggest, most important, and well loved holiday of the year. It is known as the Festival of Lights and symbolizes the spiritual “victory of light over darkness, good over evil, and knowledge over ignorance”, which is particularly significant this year. It is generally a time for visiting friends & families, exchanging gifts, wearing new clothes, and feasting to your heart’s content. It is a five-day celebration, however on the third day (considered the main day of the Diwali festival), families will light candles and fireworks. Tomorrow, Saturday, November 14th, is the third day of Diwali, and the true celebration of sweets.

Although this year’s celebrations will be much quieter than it has been in the past, the tradition of celebrating with sweets will remain the same. It is customary to show up with a tray of mithai during Diwali, and one must accept (it’s consider rude not to) when being offered one of these delightful treats.

I’ve noticed that many of my Indian neighbours have strung ribbons of lights outside of their homes and the local Indian bakeries have set up make-shift tents outside their stores to accommodate beautifully adorned red and gold boxes containing baked goods and sweets for purchase. I tried going into the bakery earlier today to buy a couple boxes of mithai (wide variety of sweets), but unfortunately I wasn’t dressed warm enough to withstand the 25 minute line-up outside.

Since I did not have luck in bringing home a box of mithai, I wondered how easy (or difficult) it would be to make some of these Indian sweets that are synonymous with this festival of hope and prosperity. I knew a handful of Indian desserts only because I was introduced to them while dining at a nearby restaurant, but never attempted making them myself. But after watching through the tutorial (videos) from Tastemade, My Ginger Garlic Kitchen, and Banglar Rannaghor , I believe I can easily recreate them … which is sweet in my books (and glycemic index).

Wishing you a Happy Diwali. I hope this Diwali be an awesome celebration for you and your family and give you blessings of wealth and success always. Let’s celebrate the festival in the true sense by spreading joy, kindness and light to the world. Have a happy, safe, and blessed Diwali!


Gulab Jamun (Indian Doughnuts) from Tastemade

These Indian-style doughnuts (soaked in sweet syrup) can be enjoyed warm, hot or cold!

Ingredients

  • 1 cup powdered milk
  • 5 tablespoons all-purpose flour
  • 1/4 teaspoon baking powder
  • Pinch of salt
  • 2 tablespoons butter, melted
  • 3 tablespoons milk
  • Ghee, to grease your hands
  • 2 cups water
  • 1 1/2 cup sugar
  • 1/4 teaspoon rose essence (or 1 teaspoon rose water)
  • A pinch of saffron
  • Oil for frying (canola/vegetable)

Steps

  1. Combine powdered milk, flour, baking powder and salt.
  2. Stir to combine.
  3. Add melted butter and add milk, and gently stir until all ingredients are incorporated and form a thick dough.
  4. Allow formed dough to sit at room temperature for 5 minutes to slightly firm up.
  5. Prepare syrup by heating water and sugar, and simmer for 5 minutes until sugar has dissolved and slightly thickened.
  6. Add rose essence and saffron.
  7. Grease hands with ghee.
  8. Gently form small balls with dough (approximately 1-1 1/2 inches in diameter), making sure not to overwork the dough. (This can lead to a tough Gulab Jamun, so be careful.)
  9. Heat 2-3 inches of oil in a deep pan on medium heat.
  10. Add balls, and cook for 5-7 minutes until dark brown in color.
  11. Immerse the hot Gulab Jamun balls immediately into the syrup, and allow to soak for a minimum of 10 minutes. The Gulab Jamun will puff up as they soak.
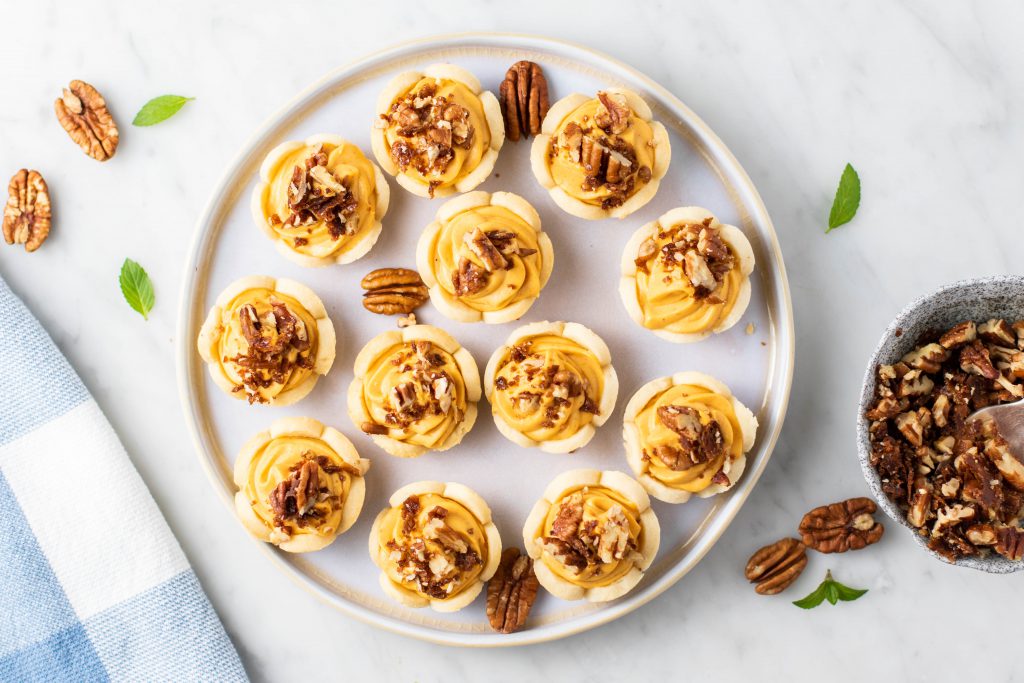
  12. Serve warm, hot, cold – whichever way you like!
Image by ikon from Pixabay

Jalebi (Indian style Funnel Cake) from My Ginger Garlic Kitchen

Jalebi is a quick and easy Indian style funnel cake recipe which is popular throughout India. This recipe can be prepared under 30 minutes, and is enjoyed by grown-ups and kids alike.

INGREDIENTS

Jalebi Batter:

• 1 cup all purpose flour/plain flour (maida)
• 3/4 cup yogurt/curd
• 1 teaspoon baking powder
• Water 2 tablespoons or more, if required
• A pinch of orange food color (optional)

  1. In a large bowl mix together flour (maida), and yogurt.
  2. Start whisking in one direction. You can use a wire whisk or you can use your hands.
  3. After 5 minutes of whisking, the mixture would start turning into a smooth and lump-free batter.
  4. Add 1-2 tablespoons of water to the batter if the batter seems a little thick. ( It has to be thick, but of flowing consistency)
  5. Once the batter is smooth, add food color (if you are opting to use)
  6. Add baking powder and mix well.
  7. The batter is now ready.

Sugar Syrup:

• 2 cups sugar
• 1 1/4 cups water
• A slice of lemon
• 1/2 tsp cardamom powder
• 12-15 saffron strands

  1. Add sugar and water to a pan.
  2. Stir well and let it boil over medium heat until sugar is fully dissolved.
  3. Once it comes to boil, add a slice of lemon and boil for a few minutes.
  4. Now add saffron strands and boil until you get the sticky syrup.
  5. The syrup we need here has almost 1-string consistency. To check sugar syrup consistency, pour a drop of syrup in a plate or bowl. Allow it to cool for a few seconds. Touch the syrup with the index finger and then touch your thumb and index finger together and gently pull apart. If the syrup is sticky then your syrup is ready.
  6. Add cardamom powder and stir well. Turn off the heat and keep aside. We need warm syrup for jalebis, so keep it on very low heat while you fry the jalebis. (You can add 1-2 tablespoons of water if it starts to thicken.)

For Frying:

• Oil or clarified butter (ghee)

  1. Heat ghee or oil in a broad pan over high heat. Once hot, turn the heat to medium. You can check if the oil is hot enough by dropping a small portion of the batter if it sizzles and comes up within seconds than the oil is ready.
  2. Now fill the squeeze bottle with the batter and pour spiral shapes or concentric circles in the hot oil.
  3. Fry Jalebis over medium heat until they are crisp and golden from both the sides.
  4. Once fried, drain jalebis on a cooling rack and let them cool for a couple of minutes.
  5. Now add fried jalebis to warm sugar syrup and soak them for 1-2 minutes.
  6. Next, remove jalebis from the syrup and place on a cooling rack or a tray lined with paper.
  7. Garnish with chopped pistachios and serve warm with some rabri or warm milk.

NOTES:

1. Add 1-2 tablespoons of water to sugar syrup every time you are heating it up. This way, the syrup will maintain it’s sticky uniformity and won’t get thicker.
2. Make sure the oil is hot enough before you drop the batter. To gauge the temperature for frying, simply drop a tiny piece of batter. If it sizzles and comes up without browning then the oil is perfect temperature. You can also use a wooden spoon, if you see bubbles around the wood then the oil is ready. If your test batter sinks to the bottom, then the oil is too cold, therefore your jalebi won’t be crispy, but soft and oily. If the batter turns brown and rises right away to the top, then the oil is too hot, your jalebi will brown on the outside too fast and inside uncooked.
3. Always fry jalebi on medium heat. If your jalebi has shrunk, then that means you over-fried your jalebi. If your jalebi turns flat, then it means that jalebis were fried on low heat or the batter was too thin. If your jalebi comes out thick & soft, the batter is too thick.

Image by M Ameen from Pixabay

Boondi Ladoo from Banglar Rannaghor

Boondi ladoo is a delicious and popular Indian sweet made from gram (ground chickpea) flour. These ladoos are called boondi ladoos, since the batter is poured through a ladle or sieve with perforations while frying. These give rise to round shaped droplets, called boondi (derived from the word ‘boond’ in hindi which means water droplets). This soft textured boondi ladoo is a crowd pleaser.

INGREDIENTS:

Boondi:

  • 1/2 cup gram (ground chickpea) flour
  • ¾ cup water + 2 tbsp
  • ¼ tsp orange food color
  • 1/8 tsp baking soda
  • ½ tsp ghee
  • ½ tsp rose water
  • 2 tbsp cashews
  • 2 tbsp pistachios

Syrup:

  • 1 cup sugar
  • ½ cup water
  • ½ tsp lime juice

Instructions:

  1. Gradually mix water to gram/chickpea flour in a bowl until smooth consistency
  2. Add baking soda and orange food coloring
  3. To create boondi, pour batter over a skimmer spoon with round shape openings onto hot oil. After each batch, wipe the perforated ladle with a clean piece of thin cotton kitchen towel from both sides.
  4. Fry until golden brown and set aside. NOTE: Fry the boondis till they are cooked. Don’t make them too crispy. When the oil stops sizzling, remove the boondis. This step is also important because if boondis becomes crispy, then the ladoos won’t be soft and they won’t be able to absorb the sugar syrup.
  5. Prepare syrup by mixing water and sugar in a pot until sugar is completely dissolved then boil for 3 minutes and squeeze lime juice
  6. Transfer the fried boondi to the syrup pot
  7. Allow the boodi to absorb the syrup
  8. Add ghee, rose water, cashews and pistachios
  9. Mix and form into small ladoo shapes
  10. Garnish with crushed nuts before serving 11.
  11. Now you are ready to enjoy!
Photo by Debasish Saha from Pexels


Be Kind!

By Jena Branco, Marketing Coordinator, Brand & Marketing Communications, SECL

Today is World Kindness Day, an international holiday that was formed in 1998, to promote kindness throughout the world. Although is It generally observed annually on November 13 as part of the World Kindness Movement, it could be argued that it should be practiced on a daily basis. Many countries including the United States, Canada, Japan, Australia and the U.A.E. observe this day.

This day is an opportunity to reflect upon one of the most important and unifying human principles. From the Random Acts of Kindness Foundation, they outlined these seven little ways that you can do today to show kindness but hopefully incorporate it in your daily life:

  1. Send an uplifting text to a friend or relative
  2. Let another driver merge into traffic with a wave and a smile
  3. Inject kindness, laughter and delight into your daily routine
  4. Go outside your comfort zone to make someone smile
  5. Share a compliment with a co-worker or friend
  6. Reach out to someone you haven’t spoken with in a while
  7. Treat someone to a cup of coffee

On that last point, a friend of mine sent me this photo that made her smile and reminded her that humanity still exist, especially in these unprecedented times when people are unemployed or down on their luck. Let us show both large and small acts of kindness, let’s promote this concept and let’s bring people of every background together!

P.S. Your friendship means the world to me, and I want to thank you for your support yesterday, today, and tomorrow. Let’s catch up over coffee soon …


It’s National SUNDAE Day!

By Jena Branco, Marketing Coordinator, Brand & Marketing Communications, SECL

As today may be the last warm day of the fall season (high is 16°C here in Toronto, ON), it’s fitting that today is National Sundae Day.

Nothing can be more decadent than an ice cream dessert topped with your favourite fruit, nuts, syrup or sauce, and whipped cream. The combinations are endless, and you can customize it any way you like.

Why not visit your local ice cream shop or simply whip one at home today? Because anything ice cream-related is a treat and will definitely put a smile on your face on this beautiful sunny day.


How to Make Mini Pumpkin Pies

By Gina Greco, Senior Brand Marketing Specialist, SEMCA

**NOTE:   The Sharp Superheated Steam Countertop Oven (SSC0586DS) is not sold in Canada, however this recipe will work in a conventional oven. Temperatures and baking times are stated in the baking instructions as an option.


These Mini Pumpkin Pies with Caramelized Pecans are the perfect fall dessert, especially during the week of Thanksgiving! Mini almond flour pie crusts are baked, filled with a creamy no-bake pumpkin mousse, and topped with caramelized pecans.

These mini pumpkin pies are the perfect ending to a large holiday meal, plus they will keep fresh throughout the weekend for when your food coma subsides!  These are also a perfect snack to share during a dessert exchange this holiday season. 

During the holidays, there are always a lot of things going on. People stopping by, phone calls, and lots of cooking. I definitely burned my fair share of recipes.

The Sharp Superheated Steam Countertop Oven heats up instantly (no preheating!), bakes 30% faster than a conventional oven, and then cools off fairly quickly. I often have left dishes in the oven after the baking time finished, and I don’t have to worry about the dish being ruined. In fact, I left a batch of these mini pie crusts in the oven for a couple of hours, and they were perfectly baked when I remembered to take them out and fill them.

I like to use a piping bag to fill these crusts, but you could easily spoon some pumpkin filling in. The pecan topping is so pretty and will cover a lot of the shape anyway!

Mini Pumpkin Mousse Pies are the perfect dessert because:

  • The creamy pumpkin filling is a cross between cheesecake and a fluffy mousse — and is made with just 4 ingredients! How much easier could you ask for?
  • The soft and buttery crusts are easy to make almond flour pie crust.
  • A crunchy caramelized pecan topping makes the perfect garnish. If you have a nut allergy, you could substitute with chocolate chips.
  • Cuteness overload! Small, perfectly shaped mini pies will capture your guests’ attention in a heartbeat! 

To make the adorable mini pie crusts, you’ll need:

After making a batch of this perfect almond flour pie crust, roll it out on parchment paper, and then freeze the thin layer of pie dough.

Cut out flower shapes, and add them to your mini muffin pan. They will still be frozen, so be patient and wait until they come to room temperature before attempting to press them down into the holes. If you skip this step, the dough will crack and ruin your adorable flower cutouts. 

Bake the mini crusts, and then pop out of the mini muffin tin. Then you’re ready for the fun part!

The Best Creamy Pumpkin Mousse Filling – Only  4 Ingredients!

Almond flour pie crust browns (and burns!) much more quickly than a traditional wheat crust (you have been warned), so I opted for a no-bake pumpkin mousse filling rather than trying to bake the crusts long enough to cook a pumpkin custard.

It’s so simple to prepare this pumpkin mousse. Trust me on this one.

Easy 4 Ingredient Pumpkin Mousse:

  • Canned Pumpkin
  • Cream Cheese
  • Pumpkin Pie Spice
  • White Chocolate Chips (or a white chocolate bar)

Process all the ingredients together and mix until light and fluffy. Then, pipe the chilled mixture into the pie crusts.

You could stop there (and your guests would still gobble these up!), but if you can add a crunchy caramelized pecan topping, why not?

These easy caramelized pecans are made in the Sharp Superheated Steam Countertop Oven, which is my go-to everyday oven.  It takes 10 minutes to melt the sugar, toast the pecans, and take these mini pumpkin mousse pies over the top!

I love my  Sharp Superheated Steam Countertop Oven for holiday baking. I mean, don’t get me wrong, I use it year-round, but during the holidays, oven space is always limited. Having a second oven means hot appetizers and freshly baked desserts all day when my guests are oven.


Print

Mini Pumpkin Pies

Mini almond flour pie crusts, baked and filled with a creamy pumpkin mousse. These little pie bites are taken over the top with a crunch caramelized pecan topping.   Course Dessert Cuisine American Keyword Gluten Free Dessert, pumpkin pie   Prep Time 45 minutes Cook Time 15 minutes 15 minutes   Servings 24 mini pies Calories 60kcal

Equipment

  • Superheated Steam Countertop Oven

Ingredients

  • 1 Almond Flour Pie Crust unbaked dough

Pumpkin Mousse

  • 1/2 cup pumpkin puree (not pie filling)
  • 1/2 cup  white chocolate chips or 1 100g bar
  • 4 ounces cream cheese
  • 1/2 tsp pumpkin pie spice

Candied Pecans

  • 2 tbsp  coconut sugar
  • 1/2 cup pecans
  • 1 tbsp butter

Instructions

  • Prepare almond flour pie crust, and roll out in parchment paper into a thin layer (about 1/16 inch thick). Try to get the crust as evenly rolled as possible, so the mini crusts bake evenly.
  • Freeze pie crust for at least 30 minutes, until very stiff.
  • Use a 3 inch flower cookie cutter to cut shapes out of the pie crust. Add a flower to the holes of a mini muffin baking tray. Lay the frozen pie crust shapes over the holes, and allow to warm up before trying to gently press the edges down into the muffin tin. I find they tear if you press down on the center, but go in easily if the edges are pressed towards the center.
  • Bake the mini pie crusts in the Sharp Superheated Steam Countertop Oven on Bake/Reheat at 325º F for 13 minutes.
  • If using a conventional oven, preheat oven to 325º F, and then bake pie crusts for 17-19 minutes, or until crusts have just begun to brown.
  • Add pumpkin mousse to a piping bag with a large tip, and pipe into the mini pie crusts. Top with candied pecans.

Pumpkin Mousse

  • Melt white chocolate by adding white chocolate chips to a small dish, and microwaving 20-30 seconds at a time, stirring in between. Be careful not to burn – white chocolate burns easily.
  • In a food processor, add pumpkin, cream cheese, and pumpkin pie spice. Process until fully mixed, and then drizzle in melted white chocolate and quickly process again so it incorporates into the mixture.
  • Refrigerate pumpkin mousse until ready to use.

Candied Pecans

  • Melt butter.
  • Add pecans to a baking tray, and drizzle with melted butter. Sprinkle coconut sugar on the top. Toss to coat, or use fingers to scrape as much coconut sugar onto the pecans as possible.
  • Add to the Sharp Superheated Steam Countertop oven and Bake/Reheat at 325º F for 10- minutes.
  • If using a conventional oven, preheat to 325º F, and bake pecans for 14 minutes.

Kitchen Island Trends

By Gina Greco, Senior Brand Marketing Specialist, SEMCA

Kitchen islands have undergone a total transformation and are now essential in the kitchen for cooking and entertaining. A few years ago, kitchen islands mainly included cabinets for storage, a few high-top seats, and gas cooktops on the counter. Today, they are much more modern with a sleek, minimalistic approach. Appliances like Sharp Microwave Drawer Ovens can help achieve that look providing both function and style into your space.

Pros and Cons of Installing /Revamping an Island 

Pros: A kitchen island can provide more countertop space, a gathering place when entertaining, additional storage and seating, and appliances like a microwave, dishwasher, or wine fridge.

Cons: Kitchen islands can be expensive to install ​and under-designed.  Modern kitchen islands need central access to sufficient electricity to power all of the convenient appliances housed there.  Islands with modular frames and removable panels make it easier to install and replace components for a future-proof kitchen.  Secondary dishwashers and wine coolers may be easily replaced with a Sharp Microwave Drawer Oven / Pedestal (SKMD24U0ES) combo. Still, proper design in a kitchen island could make having a second oven just as easy.

Must-Have Features

kitchen with Sharp built-in microwave drawer

We would definitely recommend including a built-in appliance or two. For example, countertop microwaves can look bulky and take up some major real estate. The Sharp Built-In Microwave Drawer Oven is the perfect solution to achieve a minimalist, modern-looking kitchen without compromising the most time-saving appliance in the kitchen! With various models, including IoT and easy-wave-open technology, there is sure to be a microwave that is perfect for your needs.

An island can be incorporated into any kitchen that has ample space. Even small kitchens can benefit from the placement of a tailored, well thought out island!

Things To Consider Before Committing to a New or Improved Island

Homeowners should consider their kitchen’s look and feel when incorporating an island to keep the space consistent.

It would be best if you also kept your sight-lines top-of-mind.  Although there are many shapes and styles, kitchen islands most often have 4 sides.  So not all of your appliances need to be lined up against your walls for everyone to see.  You can conceal microwave ovens and wall ovens on the “Chef’s side” and keep storage and decorative elements on the side facing out.  If a grand kitchen-scape is not a priority for you, the “Family side” of the island can store a mini-fridge for the most frequently used, child-friendly snacks, minimizing how often your family needs to traffic through your kitchen while your busy making dinner.  Busy families may consider putting a second sink on the island to better eye the kids while cleaning.

They also should keep in mind the function of their kitchen island—will it be used mainly for storage and extra counter space, or will it include seats and a bar area? Analyzing your lifestyle and kitchen activities will determine what island design will ultimately be right for you.