PUFF PASTRY BREAKFAST PIZZA

This easy puff pastry breakfast pizza is a fabulous way to use frozen puff pastry sheets! Want to have a delicious breakfast meal in 30-minutes? Try this recipe out.

This flaky pastry makes this pizza perfect for breakfast, brunch, lunch or light dinner – or can be served as an appetizer too!  What I love about this recipe is that you can use any toppings you wish.  For this vlog, I am using spinach, egg whites, cherry tomatoes, green onions, and feta cheese for a delicious breakfast treat.

Is Puff Pastry Pizza Healthy?

The short answer is NO.  In general, puff pastry crust gets its flakiness and flavour from butter and salt, and they really aren’t known for their health benefits. However, you can load up with many healthy toppings to achieve some balance!

Do You Bake Puff Pastry Before Filling?

Some recipes do not require it, however we will be blind-baking for this recipe! Blind baking is used to keep the puff pastry crust from becoming soggy due to a wet filling (in this case, our egg whites). Blind-baking allows the crust to cook most of the way through, so that when it goes back into the oven with the toppings, it only needs a few more minutes to get nice and golden brown.

Additionally, we’ll add an egg wash to the puff pastry crust before our blind-bake to create a moisture barrier, so that the egg whites do not penetrate into our puff pastry pizza crust. That’s how we make sure the pastry stays flaky and crispy, and not soggy!

Recipe tips

  • Scoring the puff pastry with a knife (or pizza cutter) about 1-in from the edge of the pastry creates an elevated, puffy border around the pizza toppings.  Make sure you don’t cut through the pastry.
  • Pricking the puff pastry with a fork, ensures crispiness by releasing steam during baking and helps prevent uneven puffy areas.

Ingredients:

  • 1 sheet frozen puff pastry, thawed
  • Handful of Baby Spinach
  • Egg whites from 2 large eggs (or ¼ cup) – save the yolks + 1 tablespoon water whisked together for an egg wash
  • 10-12 cherry tomatoes, cut in halves
  • 1/3 cup crumbled Feta
  • 1 Spring Onion, thinly sliced
  • Salt & Pepper to taste

Instructions:

  1. Preheat your oven to 425°F on a conventional oven. If using the Sharp SSC2489GS 3-in-1 Combination Steam Oven, preheat to 400°F on the Convection Bake mode, 1 tray, 10 mins.
  2. Place the thawed puff pastry sheet on parchment paper and using a paring knife or pizza cutter, gently score a 1-inch border along its edges.
  3. Using a fork, prick the puff pastry (inside the border only)
  4. Brush all over with egg wash.  Discard any remaining egg wash.
  5. Transfer to a baking sheet, and blind bake the crust for 10 minutes. Remove from oven. The centre of the pastry will have puffed up, press down with the back of a spoon, and let cool for about 5 minutes before adding toppings.
  6. Spread toppings inside the scored border with spinach, egg whites, tomatoes, feta cheese, green onions, salt and pepper.
  7. Return to oven and bake for an additional 10 minutes.
  8. Remove from oven, and cut into 8 equal squares.

Variations:

  • Cheese – You can substitute a cheesier/melty cheese in place of feta, such as monterey jack or mozzarella. Also try Boursin Garlic & Herb, Smoked Gouda, or Gruyere for an elevated flavour.
  • Vegetables – Use whatever green veggie you like on pizza – asparagus, arugula, leeks, and peas.  Be creative!
  • Bacon – What’s breakfast without bacon or prosciutto?  Just remember to cook beforehand and sprinkle over the eggs before putting in oven. You can also add slices of fresh prosciutto when removing from oven for a less crispy version.

Enjoy!


Puffed Nutella Twists

Puffed Nutella Twists are a must for Christmas. No one can resist this four ingredient treat — it can be eaten for breakfast, brunch, a sweet snack or dessert. You will love these Nutella twists because they have a rich and irresistible chocolatey flavour, with a light, delicate, flaky puff pastry.

They are easy to make too. And it only takes about 15 minutes to prepare.

So what will you need, you ask? Puff Pastry, Nutella, 1 egg, and Icing sugar (for added sweetness).

  • Puff pastry: Make sure the puff pastry dough is cold so that you can slice it easily without crushing it, usually about 2 hours thawing time from frozen.
  • Nutella: If Nutella is too hard to spread, you can microwave it on half power for a few seconds.
  • Egg wash: Egg wash makes sure the pastry is shiny and golden brown.
  • Icing Sugar: Puff pastry is generally not sweet, so you’ll need just a little sweetness to add to the Nutella.

Ingredients:

  • 2 butter puff pastry sheets, 10 by 10 inch
  • 1 cup Nutella, however measure with your heart
  • 1 egg + 1 teaspoon water for the egg wash
  • Icing Sugar for dusting

Instructions:

  • Preheat the SHARP SSC2489GS 24″ Smart 3-in-1 Combination Steam Oven to 375°F for 20 minutes. On a conventional oven, preheat to 400°F. Thaw the puff pastry as per the package directions. I used a package that contained two 10 x 10” rolls in it.
  • Roll out the first puff pastry roll and spread Nutella all over, leaving a very small border. If the Nutella is hard to spread, you can microwave it on half power for a few seconds.
  • Once you are finished spreading Nutella on the first sheet, add the second puff pastry sheet on top and use a knife or a pizza cutter to make lengthwise strips and then cut across the middle to cut them in half. You don’t have to cut them in half if you want extra long twists.
  • Take each strip and twist with your hands (approximately 3-4 twists). Place them onto a baking sheet about 1 inch apart, lined with parchment paper.
  • In a small bowl, mix one egg with 1 tsp water and lightly brush the egg wash on each twist.
  • Bake at 375°F for 15-20 minutes or until golden and flaky.
  • Let them cool on the baking tray for about 5 minutes, then sprinkle icing sugar on top … and enjoy.

Variations

There are many number of flavour variations to these twists. You can use another brand of chocolate spread, peanut butter or any nut butter you desire. Biscoff spread or your favourite jam or fruit curd are yummy too.


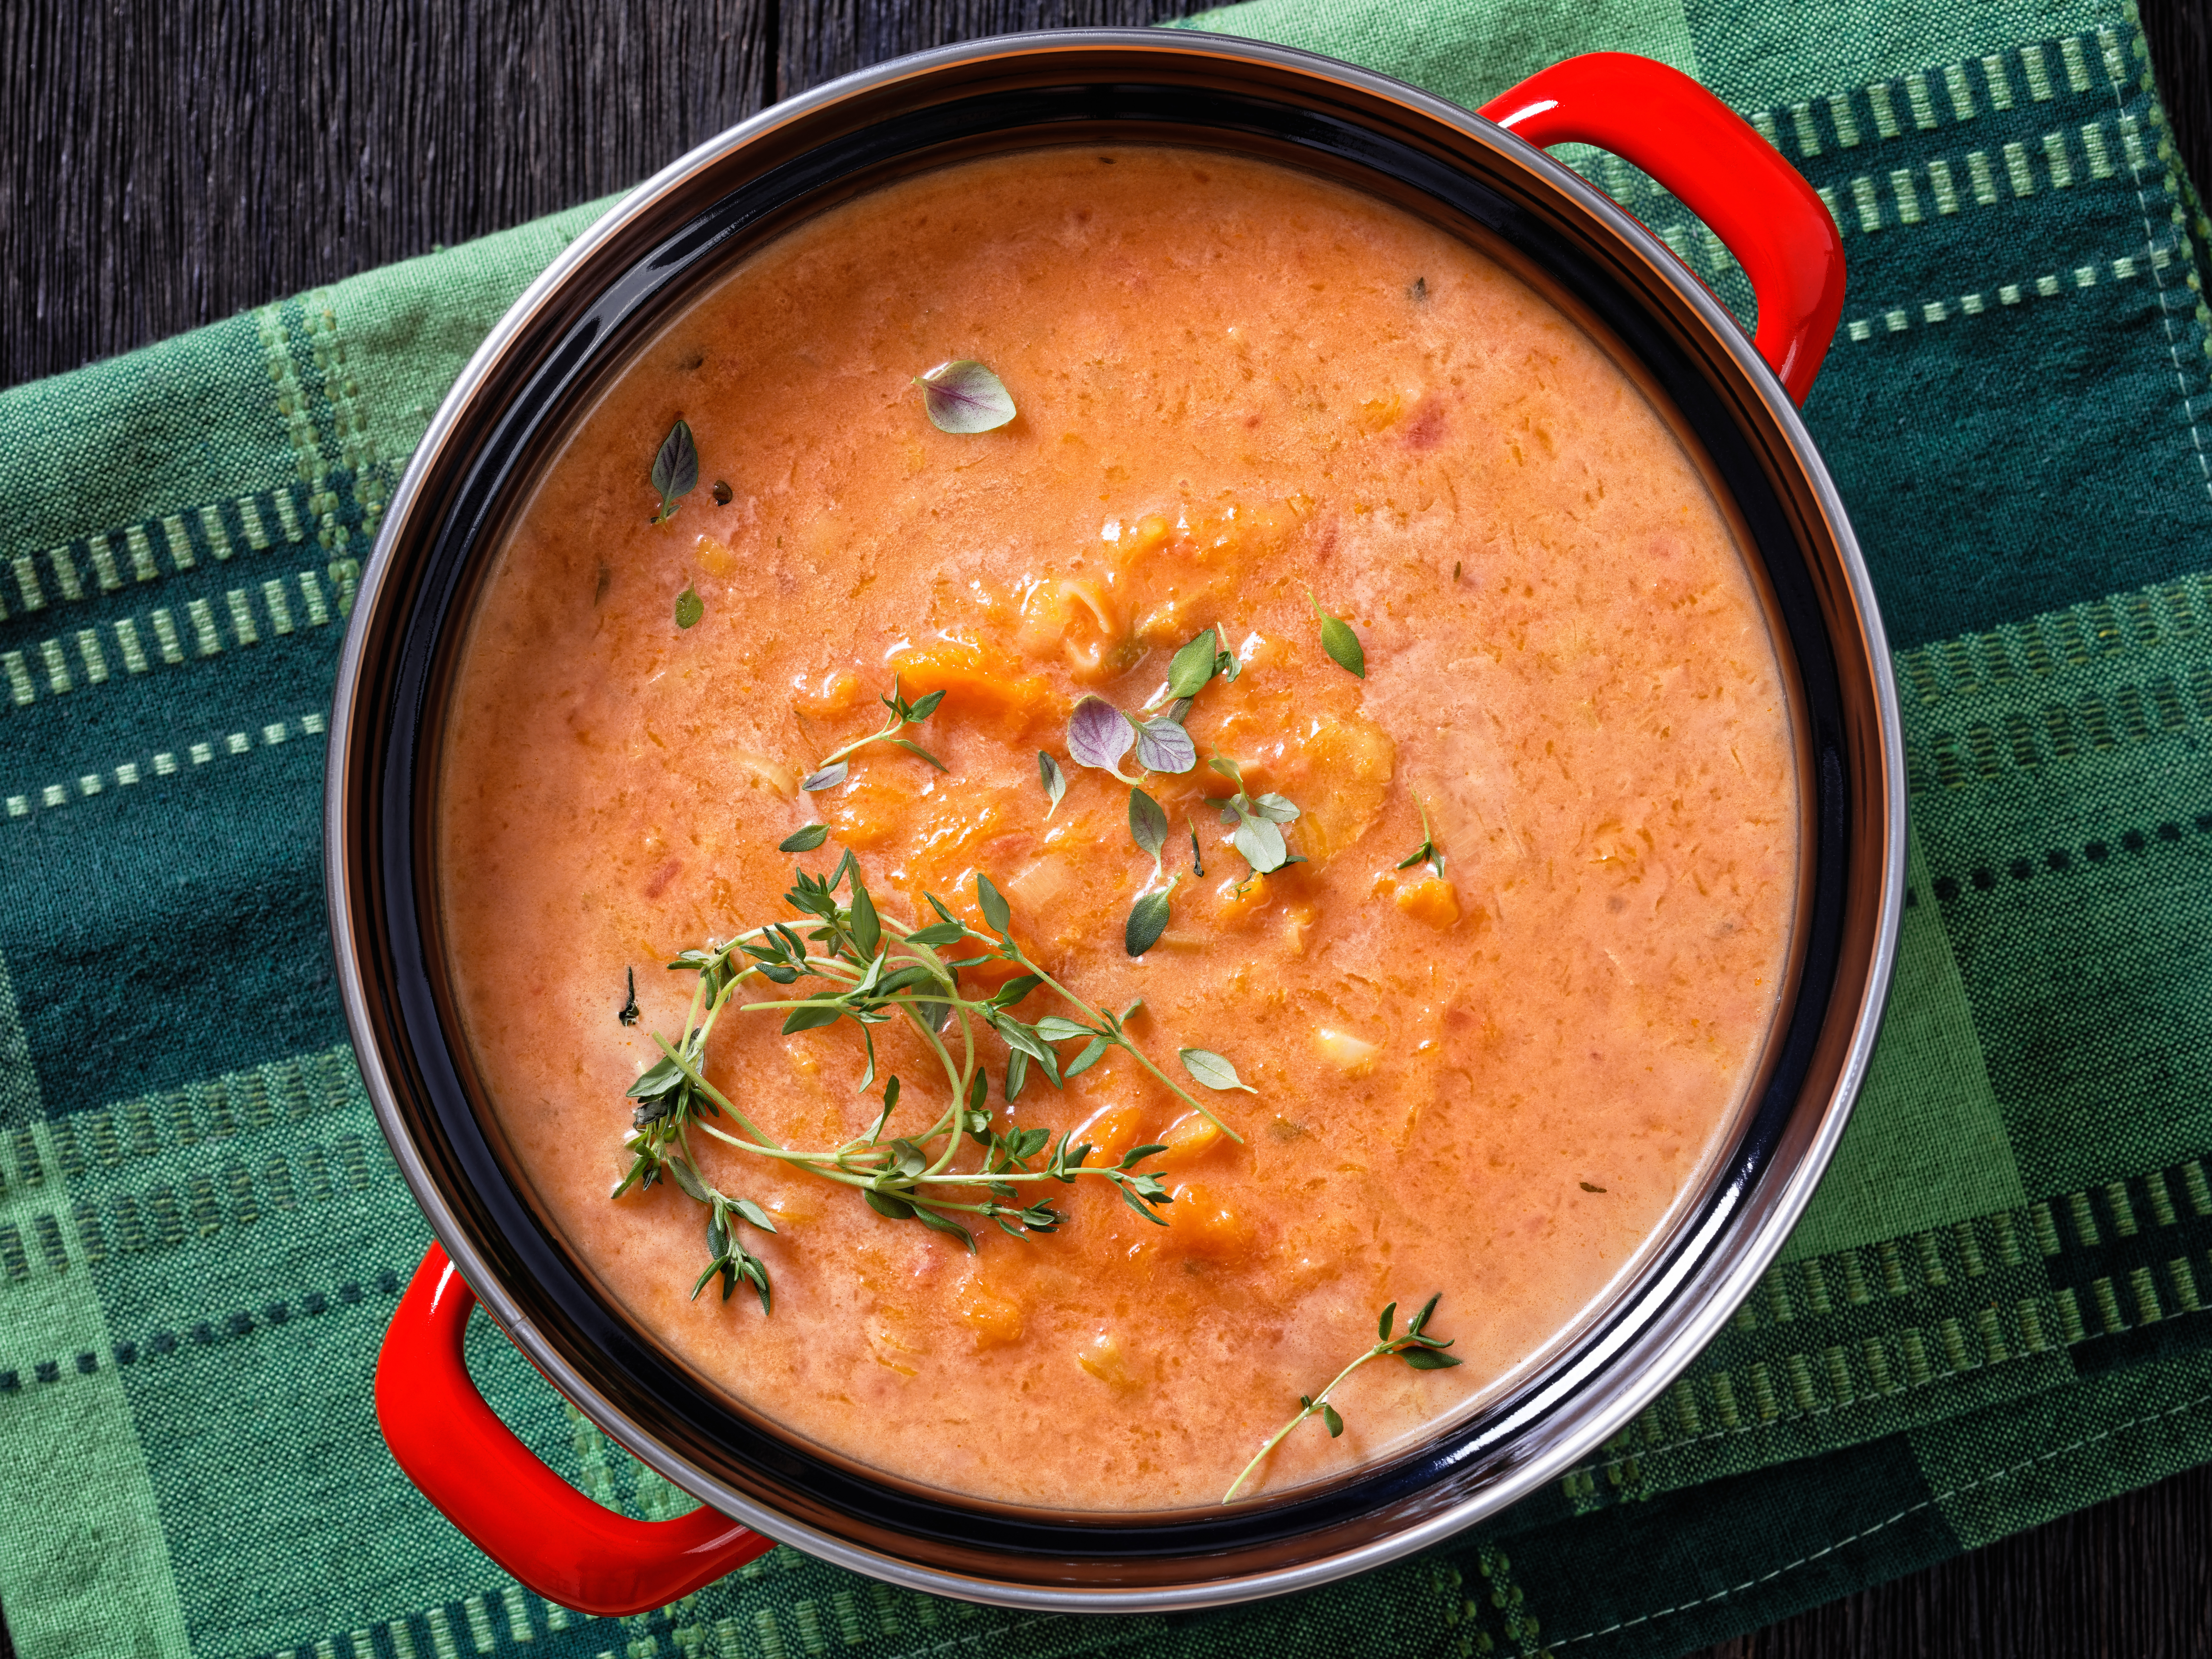
Roasted Winter Vegetable Soup (Vegan)

The other day when I walked out of my house and saw my breath in the cold air, all I longed for was summer to come back quickly.  Since it’s December, I know I must brave the cold for at least four more months.

During the next few wintery months, my weekend nights will be spent curled up on my couch with a bowl of this Roasted Winter Vegetable Soup, and re-reading the complete series of Harry Potter novels.

Ingredients:

  • 2 cups diced parsnips, peeled and chopped
  • 2 cups diced rutabagas, peeled and chopped
  • 2 cups diced turnips, peeled and chopped
  • 2 1/2 cups diced carrots, peeled and chopped
  • 2 1/2 cups diced sweet potatoes, peeled and chopped
  • 4 teaspoons olive oil, divided
  • Salt and pepper, to taste
  • 1/2 Spanish onion, diced
  • 2 cloves garlic, minced
  • 1 1/2 teaspoons fresh thyme leaves
  • 1 teaspoon chopped fresh rosemary
  • 1 bay leaf
  • 8–10 cups vegetable stock, depending on how thick you want the soup to be

Pre-heat the SHARP SSC2489GS Smart 3-in-1 Combination Steam Oven to 425°F for 30 minutes on the Convection Bake mode.  If you’re using a conventional oven, preheat to 450°F.  Divide the root vegetables evenly on two large baking sheets. Drizzle each with 1 1/2 teaspoons olive oil and season with 1/2 teaspoon salt and 1/4 teaspoon pepper. Place both baking sheets in the oven and roast for about 30 minutes flipping once rotating trays halfway through.

Heat a large pot over medium heat and add in 1 teaspoon olive oil, Spanish onion, garlic, thyme, rosemary, bay leaves, and 1/2 teaspoon salt and 1/4 teaspoon pepper. Cook for about five minutes. Next, add the roasted root vegetables and stir. Add 8 cups of vegetable stock. Bring to a boil, reduce to a simmer and simmer for ten minutes.

Turn off the heat and let the soup cool. Using an immersion blender, blend the soup to desired consistency (continue to add vegetable stock to thin out the soup). If you do not have an immersion blender, blend the soup in batches in a blender or food processor. Add the soup back to the pot and heat when ready to serve.

Enjoy!


Rice Krispies Pumpkin Shaped Treats

These pumpkin treats are adorable and fun to make.  Delight your guests at the next Halloween party or something fun at the dessert table at Thanksgiving.

If you’ve made Rice Krispies treats before, this recipe doesn’t stray from the original, the only extra ingredient is food colouring, which is added to the butter and marshmallow mixture before adding the cereal.

Experiment with your combination of red and yellow food colouring until the desired colour is achieved, but you will find that you will use more yellow than red.

While most Rice Krispie treat recipes have you press the mixture into a pan, these are rolled into balls (the size of a baseball).

Helpful hint:  since marshmallows are a really sticky situation, spray your hands with oil spray prior to rolling the balls. You will have a much easier time!

After you have your perfect little pumpkin shapes, add some additional decorations.

While they’re still warm, press a miniature Rolo into the top of each pumpkin for the stem, and beside the “stem,” cut out a leaf shape using a green sheet of roll-ups. Now you have charming pumpkins for your treat table, and better yet, everything is edible.

Ingredients

  • 6 cups rice krispies cereal
  • 3 Tbsp salted butter
  • 1 (10 oz) pkg. mini marshmallows
  • Orange gel food coloring (if not available, mix yellow and red together)
  • Mini Rolo chocolate
  • Green Fruit Roll-up sheet
  • Non-stick cooking spray

Instructions

  1. Measure out rice krispies cereal and pour into a bowl. Melt butter in a non-stick glass bowl (using a microwave) or pot over medium-heat.
  2. Add marshmallows and stir and as they begin to melt start adding in the gel food coloring until desired color is achieved. Stir constantly until marshmallows have melted (or add back into the microwave for another 30 seconds). 
  3. Remove from heat then immediately pour in rice krispies cereal and gently stir and fold with a spatula until cereal is evenly coated. Let mixture cool slightly (until it’s cool enough to handle with your hands).
  4. Spray hands with non-stick cooking spray then shape the rice krispies treat mixture into balls about the size of a baseball, then place 1 piece mini chocolate Rolo into the top center and reshape the pumpkin as needed. Transfer to a plate or dish sprayed lightly with cooking spray.
  5. Beginning on one side of the fruit roll-up and cut out a leaf shape with clean scissors then use the remaining portion of the piece of candy to roll and shape into a thin rope shape then twist into a vine shape. 
  6. Repeat with remaining candy. Store in an airtight container.

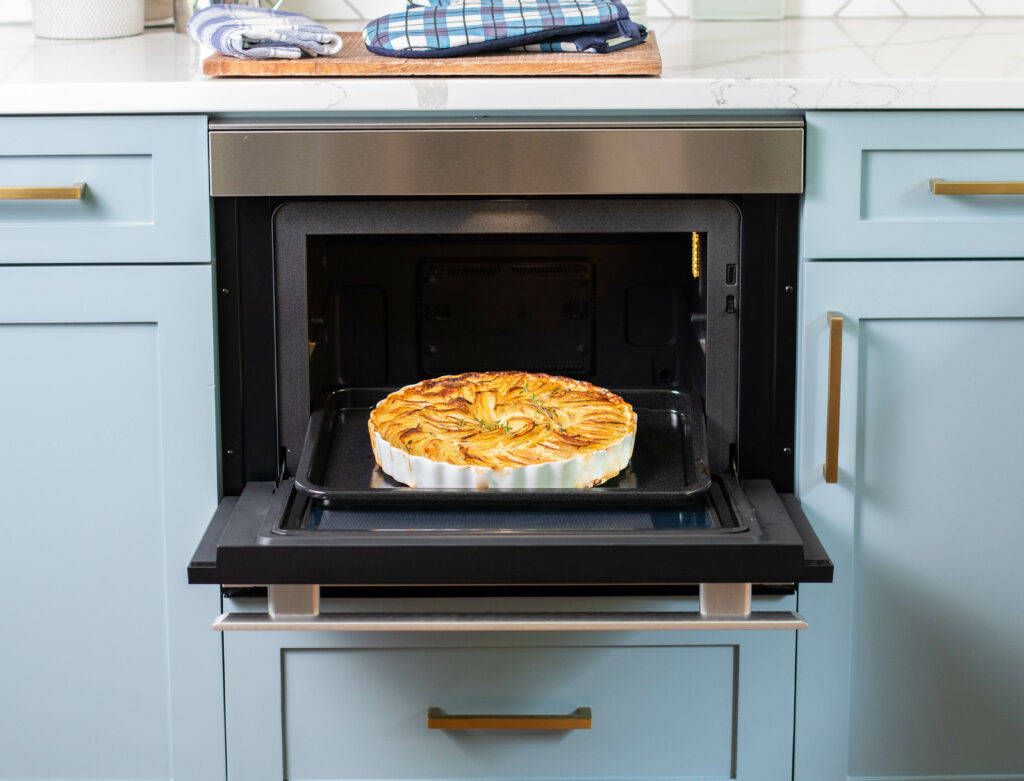
Potatoes Au Gratin Recipe

Looking for a family favorite dish? Look no further! Sharp Chef Michelle, the blogger for Sunkissed Kitchen, has provided us with the perfect dish to please even the pickiest eaters. This Potatoes Au Gratin recipe is made to perfection in the Sharp Smart Combi Built-In Steam Oven.

Ingredients

6 potatoes 5 cups sliced potatoes
1 onion
3 tablespoons butter
3 tablespoons all-purpose flour
1 1/2 teaspoons sea salt
1/4 teaspoon black pepper
2 cups whole milk
1 cup sharp white cheddar cheese shredded
1 tablespoon fresh thyme

Instructions

  1. Using a mandolin slicer, very thinly slice the potatoes and onion. Set aside.
  2. Preheat the Superheated Steam Oven to Convection/Bake at 350º F for 1 hour.
  3. Make the cheese sauce by first adding the butter to a large skillet over medium heat on your Sharp Cooktop. As the butter melts, add in the flour, stirring to create a roux.
  4. Add salt and pepper to the roux, and continue to stir for about a minute until the mixture is bubbling.
  5. Slowly add the milk about 1/2 cup at a time, stirring as the milk warms and begins to bubble. Stir to remove any lumps in the mixture. Continue adding the milk and stirring until all the milk has been added.
  6. Once the milk is smooth, add the cheese, and stir to melt it into the sauce. Add the thyme, and then remove the mixture from heat.
  7. Into a 10-inch round baking dish (a tart pan or pie plate works perfectly for this), add potatoes and onions. Mix the thinly sliced onions into the rounds of potatoes so there is an onion for every few slices of potato. Add them in a round pattern around the outside of the dish. Then, continue to add the rest in an inner circular pattern.
  8. Pour the cheese sauce over the potatoes, and use a fork to work it in between some of the layers of potato and onion, until it’s settled into the dish.
  9. Cover the baking dish with foil, and bake for 1 hour. Remove the foil, reset the oven to Bake/Convection at 350º for 30 minutes, and continue to bake to brown the top.

Notes

*If you don’t have a mandolin, very thinly slice the potatoes and onions using a sharp chef’s knife.

**Save time making this dish by adding the potatoes and onions to a 9×13 inch baking dish, pouring the cheese sauce over the top, and using a fork to coat the vegetables. This dish is delicious, even if you don’t have time for a perfect presentation.

***Gruyere cheese makes a great sub for the cheddar if you’d like a stronger flavored cheese sauce.

*** First appeared on July 11, 2022 on Simply Better Living ***


Easy Scones Recipe

Scones can be sweet or savoury, perfect with coffee and tea, and can be served at baby showers, bridal showers, brunch, snack time, bake sales, Mother’s Day, and wherever muffins or coffee are appropriate. (Which is all the time!)  

This scone recipe is so easy to make, that you may already have all the ingredients in your pantry.    

Ingredients:

  • 2 cups All-Purpose Flour
  • ¼ cup Granulated Sugar
  • ½ teaspoon Salt
  • 1 tablespoon Baking Powder
  • 1 Egg, lightly beaten
  • ¾ cup Milk
  • ½ cup melted unsalted Butter

Directions:

  • Preheat conventional oven to 400°C (or 375°C on a convection oven).
  • Combine all dry ingredients in a medium mixing bowl and mix well.
  • Add egg, milk, and butter. Combine mixture well, and form a dough.
  • Put in fridge for 10 minutes for dough to firm up.
  • Line baking tray with parchment paper.
  • Roll into 12 evenly sized balls, and place onto a baking tray.
  • Bake for 13-15 mins until lightly golden.

Slight variation:

  • Add 1 cup of your favourite berries for a wonderful fruit scone.
  • Top with medium or aged chedder cheese for a nice savoury scone.

Truly the Best Sugar Cookies Recipe Ever!

What I love about sugar cookies are that they are easy to make, shape, decorate, and enjoyed by most. You can make the dough ahead of time — refrigerate up to 2 days in the refrigerator, or even freeze them (up to 3 months) until you need them. I have even made sugar cookie dough and have them away as a gift along with a set of cookie cutters.

I had tried many sugar cookie recipes in the past, but this recipe from Sally’s Baking Addiction, is truly one of my favourites that I have been using since 2020. The cookies have a soft texture and a delightful flavour. So why not give it a try today?

Go to the link above for additional hints and video tutorial.


Ingredients – Sugar Cookies

  • 2 and 1/4 cups All-Purpose Flour, plus more as needed for rolling and work surface
  • 1/2 teaspoon Baking Powder
  • 1/4 teaspoon Salt
  • 3/4 cup Unsalted Butter, softened to room temperature
  • 3/4 cup Granulated Sugar
  • 1 large Egg, at room temperature
  • 2 teaspoons Pure Vanilla Extract
  • 1/4 or 1/2 teaspoon Almond Extract or Lemon Extract (optional)*

Instructions

  1. Mix dry ingredients together in a separate bowl — Flour, baking powder and salt. Set aside.
  2. In a large mixing bowl, beat the butter and sugar together. You can use a high speed mixer or by hand until mixture is smooth and creamy. Add the egg, vanilla, and flavoured Extract (if using). Combine well.
  3. Add the dry ingredients and mix on low until combined. Please note that dough will be relatively soft. If the dough seems too soft/sticky for rolling, add 1 more tablespoon of flour.
  4. Divide the dough into 2 equal parts. Place each portion onto a lightly floured parchment paper or silicone baking mat. Roll out the dough until about 1/4″ thick. If the dough is sticky, dust with more flour and continue to roll.
  5. When you reach 1/4″ thickness, lightly dust one of the sections. Put parchment paper on top, and place the second rolled out on top. Place on a cookie sheet, cover with plastic wrap, and chill in the refrigerator for at least 1-2 hours (and up to 2 days).
  6. Preheat oven to 350°F (177°C). Take chilled ready-to-cut dough from refrigerator and start cutting into shapes using your favourite cookie cutters. A good trick is to dip your cookie cutter in flour between each cut to avoid dough sticking into the cutter. Re-roll dough scraps to 1/4″ thickness and continue cutting until all dough is consumed.
  7. Arrange cookies on baking sheets about 2 inches apart. Bake for 8-10 minutes (8 for smaller cookies, 10 for larger cookies). Do not overbake. Cookies may not look baked at 11 minutes, but I highly suggest you remove them from the oven before you see any browning on the edges. Allow to cool on baking sheet for about 10 minutes, then transfer onto cooling racks.
  8. Allow to fully cool before decorating with icing or decorative sugar toppings.
  9. Recipe will yield about 18 – 24 cookies depending on cookie cutter size.

Ingredients – Sugar Cookie Icing

  • 2 cups Powdered Sugar
  • 6 teaspoons Water
  • 4 teaspoons Light Corn Syrup
  • ½-1 teaspoon Vanilla Extract, oil-free start with ½ teaspoon and add more to your taste
  • ½-1 teaspoon Almond Extract, oil-free start with ½ teaspoon and add more to your taste
  • ⅛ teaspoon Salt to help balance out the sweetness
  • Food Colouring

Instructions

  1. Combine all ingredients in a medium-sized mixing bowl. Using a rubber spatula, stir mixture for about 2-3 minutes until a smooth and glossy consistency is achieved.
  2. If you are using multiple colours, divide the icing into their own bowls before adding the colouring.
  3. After adding the food colouring, you will notice the icing will be slightly runny. This is normal. Different climates and humidity levels can affect the consistency of the icing. If too wet, add powdered sugar (1 teaspoon at a time), if too dry, add more water (1/8 teaspoon at a time).
  4. Spoon the icing into piping bags or squeeze bottles. If you do not have either of these, you can also spoon the icing into plastic ziploc bags and snip off a small bit off one corner.
  5. To decorate, first outline each cookie with the icing. Fill the rest of the cookie with the icing, then use a toothpick to help spread the icing and fill in any holes.
  6. Enjoy the cookies immediately OR allow the icing to “harden” overnight (or about 12 hours), uncovered. Do not stack until the sugar cookie icing has hardened. The cookies will stay soft for 4-5 days in an airtight container.

Memphis-Inspired Brussels Sprouts

  • Contribution and Recipe by Kevin Lee, AVP, Office Solutions Sales & Marketing, Sharp Electronics of Canada

To celebrate National Brussels Sprouts Day, I am reposting this blog originally posted on Dec 2020. This dish was inspired while on a business trip that took Kevin and his colleagues to our Sharp Manufacturing Company of America (SMCA) factory in Memphis, Tennessee. After spending much of the day at the plant, the team ended up going to a Memphis restaurant for dinner. This dish was ordered as an appetizer by his colleague Rolland, but was coaxed into trying it. After the first bite, Kevin’s taste-buds were awakened to the flavours of that Brussels sprout dish that he will never soon forget. He loved it so much, that when he came home, he had to recreate this dish! After a few tries, Kevin finally got the flavour and texture he desired (and remembered) … and we are so pleased that he is sharing this dish with all of us.

There are many debates on which way is best to prepare Brussels sprouts. You have the older generation that will attest that over-cooked, boiled Brussels sprouts is how it should be served, this is how I recall it as a child. Because of this childhood trauma, I never touched these lovely little green mini-cabbages again until I was in my thirties.

Up until a couple of days ago, Brussels sprouts were always prepared on a roasting pan, mixed with balsamic vinegar, salt & pepper, and popped into the oven at least a couple times a week as a side dish.

I decided to finally give Kevin’s recipe a try (on the stovetop) with my cast iron skillet this weekend, and SHOCKING to me … but I’m hooked on this entirely new (and faster) preparation method. Charred and crispy on the outside, lightly caramelized and tender on the inside, these Brussels sprouts taste amazingly good, even addictive!

If I haven’t convinced you to try Brussels sprouts yet, then perhaps telling you that they are so good for you, will! They contain vitamins (such as A, B6, C and K) and minerals (like manganese, folate, iron, magnesium and potassium). These vitamins and minerals are good for your immune system, heart and bones. They are also low-calorie, fat-free (when not prepared with added oil), and full of fibre, which is great for keeping your digestive system running smoothly.

So which is better? Oven-roasted or pan-roasted? To be honest, I enjoy them both. I love the fact that you can toss the sprouts in the oven and let it cook while I’m busy preparing other meal items versus standing guard over the stove-top ensuring they don’t burn. I think, the most distinct difference is texture. Oven-roasted Brussels sprouts tend to be tender all the way through the interior, allowing it to truly melt in your mouth. While pan-roasted Brussels sprouts tend to be firmer, cooked more on the outside and slightly tender in the interior. I enjoy them both for different reasons and appreciate the variation. You’ll have to try both methods and see what you think.

So if you’re looking for a new way to enjoy these beautiful little bulbs, you’re going to be happy you’re reading this recipe. We hope you enjoy it!

How to Trim Brussels Sprouts

Before trimming the Brussels sprouts, make sure you wash them in a colander, ensuring all the dirt is removed.

Dry them on a kitchen towel for a bit before cutting.

Use a knife to cut the tough stem, remove any yellow or damaged leaves.

Cut each Brussels sprout in half lengthwise, from tip to trimmed end.

If you come across one of those “monster” sprouts, feel free to quarter it.

Ingredients

All you need to make these Memphis-Inspired Brussels sprouts are olive oil, red wine vinegar, soy sauce, oyster sauce, ground pepper, and soft cheese for the finishing touch.

  • Brussels sprouts, washed, trimmed and halved (3 cups)
  • Extra Virgin Olive Oil (2 tablespoons)
  • Red Wine Vinegar (1 tablespoon)
  • Soy Sauce (1 tablespoon)
  • Oyster Sauce or Hoisin Sauce (1 teaspoon)
  • Freshly ground black pepper (pinch)
  • Handful of Soft Cheese (Boursin Garlic & Fine Herbs / Feta Cheese / Parmesan / Goat Cheese / or any other crumbly cheese)

Preparation

  • Prep Time: 10 mins
  • Cooking Time: 15 mins
  1. Heat the olive oil in a large skillet for approximately 2 minutes over medium heat.
  2. Add the Brussels sprouts and toss to coat. Flip the sprouts so they are facing down (cut-side down) and let sit undisturbed for approx 5-7 minutes, until they develop a dark, caramelized sear (as if you are charring).
  3. Add red wine vinegar, soy sauce and oyster sauce in a 2:2:1 ratio (Kevin suggests applying 1 teaspoon at a time, and apply based on your liking)
    • Hint: I didn’t have oyster sauce on hand, so I substitute it with Hoisin sauce. It added a sweeter flavour, so I added a bit more red wine vinegar to counter balance the sweetness.
  4. Add the pepper, and stir.
  5. Continue cooking, stirring every few minutes, until the Brussels sprouts are all browned and starting to tenderize in the centre (about 5 to 7 additional minutes).
  6. Transfer to plate and sprinkle with a handful of crumbled soft cheese
    • Hint: I also sprinkled this dish with a handful of pomegranate seeds for colour and additional nutritional value
  7. Serve immediately!
    • Hint: This dish can be served as an appetizer and goes really well with a glass of white wine (Pinot Grigio perhaps)

How to Make Paper Bag Popcorn

Making paper bag popcorn in the microwave is one of the easiest ways I know to make popcorn with less cleanup, and creating a healthier version compared to store-bought microwave popcorn.

Here’s what you will need:

  • Popcorn kernels
  • A brown paper lunch bag


Directions
:

Step 1:  Pour ¼ or ½ cup of popcorn kernels into the bag.

When I make popcorn for myself, I use about 1/4 cup of kernels, it’s the perfect amount for a snack-size serving. Use 1/3 cup if you want to share with another person or use ½ cup to completely fill the bag with popped popcorn.

Step 2: Close the bag

Fold the top of the bag twice to prevent the kernels from spilling out.

Step 3: Listen to the popcorn pop

Microwave on high heat for 2 – 3 minutes or until you can’t hear any more kernels popping.  Depending on the type of kernels you use and your microwave’s power, timing will vary.

When the microwave stops, let bag sit for about a minute.  Remove popped popcorn and place in a bowl.  If there are any uncooked kernels, keep inside the paper bag, refold the top of the bag, and microwave for an additional minute.

Step 4:  Add any flavouring you wish

My favourite is still the traditional buttered-flavour popcorn.  Take a stick of butter (I use salted butter to avoid adding further salt) and melt in the microwave for a minute.  Pour melted butter over the popcorn, toss to mix, and enjoy!


Super Easy Baked Feta Pasta

By Jena Branco, Senior Marketing Specialist, Brand & Marketing Communications, SECL


There’s a reason this baked feta pasta is an internet sensation! My twist on the very popular dish from Finland, with a salty baked feta, sweet cherry tomatoes, fresh garlic, asparagus and parsley are tossed with al dente rotini pasta to create this easy, creamy, yet delicious dish!

Baked Feta Pasta is the latest trend to go viral all over the internet and you can find tons of videos and pictures on TikTok, Twitter and on your Instagram feed.

This recipe has 8 ingredients — a block of feta cheese, EVOO (extra virgin olive oil), cherry or grape tomatoes, fresh garlic, asparagus, and a short pasta of your choice — and of course, salt and pepper to taste.

  • Tomatoes – cherry or grape tomatoes work great.
  • Asparagus – I added it as a veggie to the dish but you can omit if desired. I think next time, I will also add some fresh spinach.
  • Olive oil – extra virgin olive oil has the best flavour, and I encourage you not to skimp on it.
  • Salt and pepper – a little goes a long way since the cheese is naturally salty.
  • Feta cheese – block-style feta is best and will give you the creamiest consistency (but the crumbly kind works too). Greek Feta cheese is slightly creamier and stronger flavour, but Canadian Feta made from cow’s milk also works great — this is the kind my picky son prefers.
  • Pasta – short pasta (like penne, rigatoni, fusilli, or farfalle) is easier to mix in. I used rotini pasta in my dish.
  • Parsley – use a generous 1/4 cup or substitute with fresh chopped basil.
  • Garlic – Add half while baking and the rest as soon as it comes out of the oven.

Baked Feta pasta is a brilliant way to create a creamy pasta sauce. You basically bake a block of feta in a 9″ x 13″ casserole dish together with tomatoes, garlic, EVOO, and a little salt and pepper. When the tomatoes burst and cheese starts melting, you mash the cheese into a creamy pasta sauce, add your pasta, mix together, and you have the perfect pasta dish that can be served as a main dish or an accompaniment to a meal.

My spin on this baked feta pasta is the added asparagus as I wanted to introduce a vegetable into the dish and make it as a main meal without a meat protein in it … and it’s also the only vegetable my son doesn’t mind eating.

Origin of Feta Pasta

The Baked Feta pasta craze was started in 2019 by Tiiu Piret and Liemessa, two bloggers from Finland. Liemessa’s recipe was then adapted in the U.S. which went viral on TikTok and has became a major trend.

The best thing about this baked feta pasta dish is unlike heavy cream-based sauces which can separate, this recipe retains it’s creamy texture. Add a bit of filtered water (or pasta cooking water if you have any left), before reheating in the microwave or stove-top.

How to Make Baked Feta Pasta

This recipe is so easy. You mix everything in one dish! The veggies and cheese sauce bake together in the oven while your pasta boils on the stove, then you combine them together and you have an incredible Baked Feta Pasta dish.

  1. Prepare veggies – in a 9″ x 13″ casserole dish, combine tomatoes, asparagus, 1/3 cup olive oil, half of your minced garlic (two cloves), salt, and pepper. Toss to coat the veggies, then create a space in the centre.
  2. Add Feta cheese – place the block of feta cheese in the centre and drizzle on top with 1 Tbsp EVOO and some black pepper. Bake at 375˚F for 30 minutes in your Sharp 24” SuperSteam+™ Superheated Steam and Convection Built-In Wall Oven, until tomatoes start to rupture. If you are using a conventional oven, you will bake at 400˚F for 30 minutes.
  3. Cook pasta – while the baked feta is cooking in the oven, start cooking your pasta in a pot of salted water until al dente according to package instructions. Very important: Reserve 1/2 cup hot pasta water.
  4. Add garlic and herbs – remove the baked feta dish from the oven, and add finely chopped parsley and remaining minced garlic. Use the back of a spoon to mash the cheese, and mix with the oil and juices released from the tomatoes.
  5. Add pasta – drain the pasta (no need to rinse the pasta) and add it to the hot cheesy sauce. Mix until all the pasta is coated with the creamy feta sauce. To add an additional creamy texture, pour some of the reserved pasta water, in small amounts, until the desired creaminess is achieved.

Serve this dish a s a main course or as an accompaniment to a meal. Add proteins to the dish, like chicken tenders or shrimp (add during prep and it will cook with the rest of the dish in the oven) or add any veggies you like (such as sweet bell peppers, spinach, rapini, or broccolini). This recipe is so versatile and easy to make, that you can whip it up easily for dinner during the busy work week. Serve this dish with a simple salad, and your family will think that you’ve spent hours in the kitchen making it!

Ingredients

  • 3 cups cherry or grape tomatoes
  • 1-1/2 cup asparagus (ends trimmed and cut into bite-size pieces)
  • 1/3 cup extra virgin olive oil plus 1 Tbsp to drizzle over cheese
  • 1/4 tsp salt
  • 1/2 tsp black pepper
  • 225g block Feta Cheese
  • 2 cups rotini pasta
  • 4 garlic cloves finely minced, divided
  • 1/4 cup fresh parsley or basil, finely minced

Instructions

  1. Preheat oven to 375˚F in your Sharp 24” SuperSteam+™ Superheated Steam and Convection Built-In Wall Oven, in the Convection Bake mode for 30 minutes. If using a conventional oven, you will preheat at 400˚F.
  2. Add 1/3 cup olive oil, tomatoes, asparagus, 2 minced garlic cloves, 1/2 tsp black pepper, and 1/4 tsp salt to a 9″ x 13″ casserole dish.
  3. Toss to combine. Create a space in the centre and place your block of feta in the pan. Drizzle the top with 1 Tbsp olive oil and another sprinkle of black pepper. Bake for 30 minutes (on top rack, or middle tray in a conventional oven) until tomatoes start to rupture.
  4. While the baked feta is cooking in the oven, bring a pot of salted water to a boil and add pasta. Cook pasta according to package instructions, stirring a few times to keep the pasta from sticking. Drain pasta (reserving some cooking water if you decide to add it later).
  5. At about 30 minutes, the tomatoes should start to release their juices (crinkly roasted skin is the indicator). Remove from the oven and immediately stir in remaining minced garlic and parsley. Toss to combine.
  6. Using the back of a large spoon to press the cheese into the olive oil and stir until cheese is well incorporated in the dish.
  7. Stir in drained cooked pasta. Add reserved pasta water for a creamier texture, if desired. Serve warm.
  8. Important: Be careful with those tomatoes (the juicy centres will be very hot if you eat them right away).